Chocolate Peanut Butter Shake

This smoothie is like a shake and it’s perfect for breakfast, lunch, or even dessert. It’s also pretty filling because of the oats, protein powder, and peanut butter.

I don’t typically measure out my ingredients when making smoothies. I usually just eyeball it, but I wanted to create some smoothie recipes with concrete measurements for people to recreate. To make this smoothie thicker, add more ice and if the smoothie isn’t blending very well, then add a little more almond milk. You could also add sweetener to this smoothie if you’d like, but I think it’s sweet enough with the banana. 

Ingredients

  • 1 banana
  • ¼ cup gluten-free rolled oats
  • A serving of chocolate protein powder (I used the Nuzest Digestive Support protein)
  • 2 teaspoons cacao powder
  • 1 tablespoon peanut butter
  • 1 teaspoon cinnamon
  • ½ cup almond milk
  • Ice (I probably used about 10-12 ice cubes, but you can add as much as you’d like. The more ice, the thicker the smoothie)
  • Cacao nibs to top (optional)

Directions 

  1. Blend together all the ingredients except the cacao nibs.
  2. Pour into a glass and top with cacao nibs and some more peanut butter, if wanted. 
Iced Matcha Latte

Recently I’ve been having matcha in the morning, so I decided to show how I’ve been making it. 

Matcha is a great alternative to coffee because it has caffeine and boosts your energy, but it won’t give you jitters or a crash like coffee. Matcha promotes feelings of relaxation, improves focus, and it’s full of antioxidants. These are only a few of the many benefits of matcha.

I also like to add collagen to this drink because I try to have collagen every day, but this is optional.

Ingredients

  • About 4 ounces of water
  • 1 teaspoon matcha
  • Sweetener to taste (I used date syrup, but you could use honey, maple syrup, etc.)
  • A scoop of collagen (optional)
  • Ice
  • Almond milk (use my easy recipe to make your own!)

Directions

  1. Heat up the water until it’s just under a boil.
  2. Pour the water into your glass and then add the matcha, sweetener, and collagen, if using. Use a hand held frother to mix this all together. 
  3. Add ice to the glass.
  4. Fill the rest of the glass with almond milk.
  5. Stir and enjoy!

Date Caramel

If you’re someone who has a sweet tooth or loves caramel, then this recipe is for you! This caramel is a lot healthier than store bought and is super easy to make. Serve this with apples, pretzels, or whatever else you’d like. This recipe is gluten-free, vegan, dairy free, and can be made nut free if you use Sunbutter. 

Ingredients:

  • 12 pitted medjool dates
  • 1 tablespoon nut or seed butter (I used Sunbutter)
  • ½ cup water (use more to make it thinner or less to make it thicker)
  • 1 teaspoon salt
  • 1 teaspoon vanilla

Directions

  1. Add all the ingredients to a food processor.
  2. Blend until smooth. Stop and scrape down the sides as needed. Add more water if needed. 
  3. Scoop out into a dish to serve and enjoy!

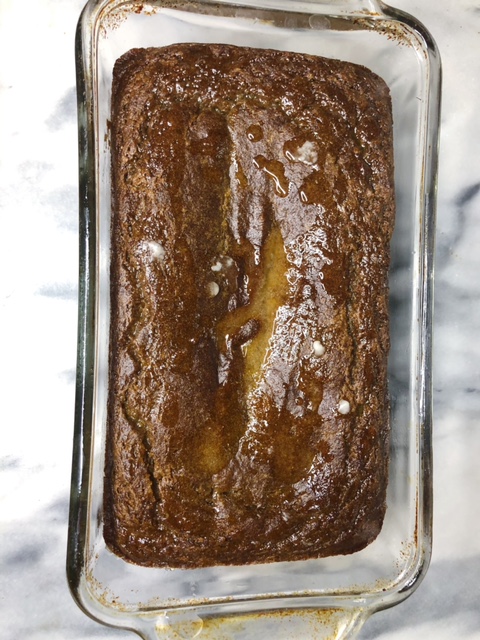
Blueberry Zucchini Bread

I found a recipe for gluten free zucchini bread, and unlike most zucchini bread recipes, this one involved blending the zucchini up which is different, so I wanted to try it, but I didn’t like a lot of the ingredients or measurements, so I had to change the recipe up quite a bit, and after several tries this is what I came up with. This recipe is pretty easy to make, it just takes a little while to bake because it’s bread. I added fresh blueberries to this, but it’s not necessary. You could also add chocolate chips if you’d like. The zucchini makes the bread super moist, which makes it delicious, but be careful not too add more than two cups of zucchini, otherwise the bread will fall apart when you try to eat it. This recipe is gluten free and dairy free.

Ingredients

  • 1-2 cups chopped zucchini
  • 2 eggs
  • ½ cup oil (can use coconut, grapeseed, or avocado)
  • 1 teaspoon vanilla
  • ¾ cup almond flour 
  • ¾ cup cassava flour
  • ½ cup coconut sugar
  • 1 teaspoon baking powder
  • ¾ teaspoon baking soda
  • 1 teaspoon cinnamon
  • ½ teaspoon salt
  • Blueberries or other add-ins (optional)
  • The juice of half a lemon
  • 1 tablespoon powdered sugar

Directions

  1. Add the zucchini, eggs, oil, and vanilla to a blender and blend until it’s all mixed together.
  2. In a large bowl mix together the flours, sugar, baking powder, baking soda, cinnamon and salt.
  3. Pour the zucchini mixture into the bowl and mix with the dry ingredients.
  4. Fold in blueberries, chocolate chips, or anything else you want (optional).
  5. Pour the mixture into a greased loaf pan.
  6. Bake at 325 F for about an hour.
  7. Use a toothpick to check if the bread is ready after an hour. If it’s still not cooked, let it bake about 5-10 more minutes and check again.
  8. Let the bread cool off.
  9. In a small dish, mix the lemon juice and powdered sugar together, then drizzle over the loaf of zucchini bread.

Summer Fruit Crumble

It’s Labor Day, which unfortunately means summer is coming to an end, so I made one last summer dessert that is perfect for Labor Day, or any day really. You can choose whatever fruit you would like for this recipe. Some fruits I would recommend are blueberries, peaches, cherries, blackberries, raspberries, or plums. Feel free to use a mixture of these fruits as well. I used blueberries and nectarines for mine, and it was delicious! This recipe only uses six different ingredients, and it’s super easy to put together. 

Ingredients for filling:

  • 3 ½ cups fruit
  • 3 tablespoons coconut sugar
  • The juice of half a lemon
  • 2 teaspoons tapioca flour

Ingredients for topping:

  • 3 tablespoons butter or coconut oil
  • 1 cup almond flour
  • 3 tablespoons coconut sugar

Directions

  1. Spray an 8×8 inch baking dish with cooking spray, and add in all the ingredients for the filling. Toss to coat the fruit.
  2. Add all the topping ingredients to a bowl and use your hands to mix the ingredients.
  3. Use your hands to crumble the dough over the fruit.
  4. Bake at 375 F for about 30 minutes.
  5. Top with vanilla ice cream (optional) and enjoy!

Gooey Peanut Butter Chickpea Blondies

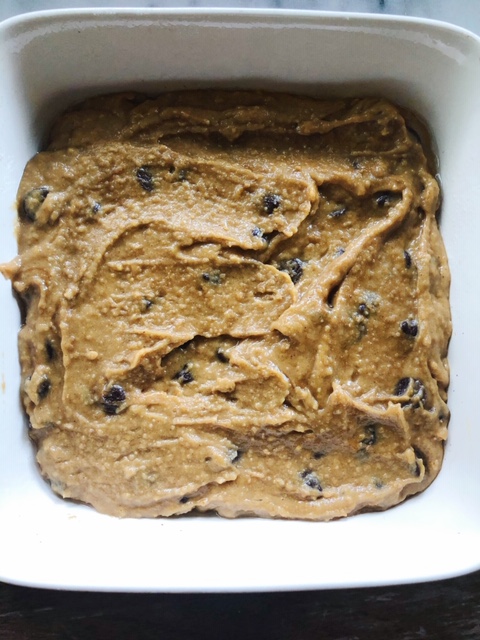
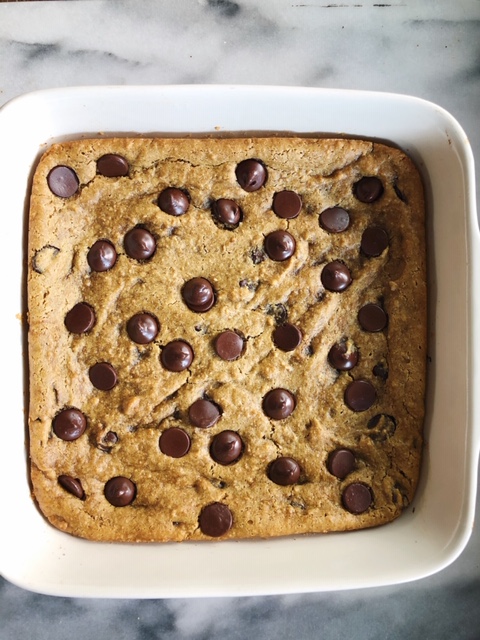
These chickpea blondies are so delicious and can easily be made vegan! My family devoured these within days, so I’ll have to make more in the future. This is another recipe using a can of chickpeas, so keep the liquid to make my chocolate mousse or another recipe!

Ingredients

  • A can of rinsed and drained chickpeas (keep the liquid to use in other recipes if you want)
  • ¾ cup brown sugar
  • ⅓ cup peanut butter (or any nut butter)
  • 1 teaspoon vanilla
  • ¼ cup almond flour
  • ¼ teaspoon baking soda
  • ½ teaspoon baking powder
  • ¼ teaspoon salt
  • Desired amount of chocolate chips (use non-dairy chocolate chips for vegan)

Directions 

  1. Add all of the ingredients except the chocolate chips to a food processor and blend until combined.

2. Fold in chocolate chips

3. Pour the dough into an 8×8 inch pan lined with parchment paper and spread evenly with a spatula.

4. Sprinkle more chocolate chips on top, if desired.

5. Bake at 350 F for about 30 minutes. Let cool and enjoy!

Vegan Chocolate Mousse

This chocolate mousse is made with only four ingredients and can be made vegan as long as you use non-dairy chocolate chips. Instead of using egg whites, we are using aquafaba, which is the liquid from a can of chickpeas. This whips up just the same way. If you’d like to use the chickpeas, click here for a hummus recipe!

Ingredients

  • The liquid from one can of chickpeas (aquafaba)
  • 2 tablespoons sugar or sweetener of choice
  • ½ cup melted chocolate chips (vegan)
  • 1 teaspoon vanilla

Directions 

  1. In a medium-sized bowl, beat the aquafaba with an electric mixer until stiff peaks form.
  2. Melt chocolate using a double boiler and stir frequently. Let the melted chocolate cool slightly. 
  3. Fold in the melted chocolate, sugar, and vanilla. Be careful not to overmix.
  4. Distribute into bowls to serve (makes 3-4 servings) and chill for at least 3 hours or overnight.
  5. Serve with fruit or whipped cream on top. Use this recipe to make some coconut whipped cream to add to the top (also vegan).  

Dairy Free Coconut Whipped Cream

This recipe is perfect for topping off so many desserts. It goes well on top of cake, pudding, fruit, mousse, ice cream, or anything else you would like. It also works well as an icing! This whipped cream is a healthier version than the store-bought kind, but it is still delicious and tastes like coconut! Plus it’s vegan! This recipe is super quick to make, except for the fact that you need to chill a can of coconut milk for at least 24 hours, so I would recommend storing your cans of coconut milk in the refrigerator.

Ingredients

  • A can of coconut milk chilled for at least 24 hours
  • 1-2 tablespoons sweetener (sugar, maple syrup, agave syrup, powdered sugar, etc.)
  • ½ teaspoon vanilla

Directions

  1. Take your can of coconut milk out of the fridge and flip it over. Open the can and scoop out the coconut cream into a bowl.
  2. Use an electric mixer to beat the cream until smooth and fluffy.
  3. Add in sweetener of choice to taste and vanilla. Mix again. 
  4. Serve on top of any dessert or place in the refrigerator until ready to use. 

Hummus

You can easily make your own hummus right at home only using a few ingredients. This comes together quickly and makes for the perfect snack. I love to eat hummus with veggies or vegetable chips. Hummus is also full of protein!

This recipe uses chickpeas, so I’d recommend keeping the liquid from it to make another recipe. This liquid is called aquafaba and can be whipped up like egg whites. Check out this recipe here using aquafaba to make chocolate mousse!

Ingredients

  • A can of rinsed and drained chickpeas (save the liquid) 
  • A chopped clove of garlic
  • The juice of half a lemon
  • 2 tablespoons tahini
  • Salt to taste
  • Water as needed
  • Paprika (optional)

Directions

  1. Add the chickpeas, garlic, lemon juice, and tahini to a food processor and blend until smooth.
  2. Add salt to taste and as much water as needed if the mixture is too thick.
  3. Place the hummus in a bowl to serve or keep it in a sealed container in the fridge for about 5-7 days. Sprinkle paprika on top of the hummus, if using.

Chia Seed Pudding

Chia seed pudding makes for a great breakfast or snack. Chia seed pudding can be customized any way you like it by adding fruit, nuts, nut butter, sweetener, or anything else you’d like. I prefer to use almond milk, but any type of milk will do. I also like to add some sort of sweetener and vanilla because chia seeds don’t have any flavor, but this isn’t necessary. The pudding can be stored in the fridge for up to a week.

Chia seeds are full of antioxidants, and they’re high in fiber, protein, and omega 3 fatty acids. Chia seeds are good for digestion, but it’s important not to consume too many at once as this can do more harm than good for your digestion. This is because of the fiber. Soaking the chia seeds allows your body to easily digest them and to absorb the nutrients better. This recipe calls for two tablespoons of chia seeds which are about one serving, so if you want to double or triple the recipe, you can, but don’t consume more than one serving at a time. 

Ingredients

  • 2 tablespoons chia seeds
  • ½ cup milk
  • ½ tablespoon maple syrup, honey, or sweetener of choice
  • ¼ teaspoon vanilla (optional)
  • Toppings of choice: fruit, nut butter, nuts, granola, cinnamon, coconut, etc.

Directions 

  1. Add all the ingredients to a mason jar or bowl and mix them together.
  2. Put in the refrigerator and let sit overnight. 
  3. When ready to eat, stir, and add any toppings you’d like.